Create a Directory and Save an Uploaded File on It in Asp.net Core
File upload in ASP.NET Core MVC (Storing in Binder)
In this Part, nosotros are going to learn how to upload files and shop in a folder in ASP.Cyberspace Core MVC in a stride by footstep way.
- Creating ASP.NET Core Application
- Calculation Controller
- Calculation View
- Adding Images Binder to Shop Uploaded Images
- Calculation Index Action Method to Handle POST Request
- Uploading Image
- Output

We are going to create ASP.Cyberspace Core Web Application for that we are going to choose ASP.NET Core Web Application template.
Creating ASP.Internet Core Application

Next, nosotros are going to set Projection Name WebApplication12 and location and in last function, we are going to choose .Net Core framework and ASP.NET Core Version three.0 as the framework for application and few advance settings for such every bit configuring https and enabling docker we are not going to enable docker settings for this project.

Now finally click on create button to create a project.
Project structure
The project structure generated according to the configuration.

After creating a project, the next pace nosotros are going to add together a controller.
Adding Controller
We are going to add together a controller with Name Demo Controller later on adding controller we have default Alphabetize activity method in it.
using System; using System.Collections.Generic; using System.Linq; using System.Threading.Tasks; using Microsoft.AspNetCore.Mvc; namespace WebApplication12.Controllers { public class DemoController : Controller { public IActionResult Index() { return View(); } } } After adding Demo Controller and Alphabetize Action Method next nosotros are going Add Index View.
Adding View
For Calculation View just by right-clicking inside Index Action Method and from the list choose Add View option a new dialogue pops up which has View Name same every bit Action Method Name Index side by side we are not going to select Template and Model grade for this View click on Add button to create View.
After Creating Index View Side by side, nosotros are going to add Form tag with the encoding type "multipart/grade-information" and ready Controller and Activity which handle Post Request an within grade tag nosotros are going to add file input command and submit push (Upload).
Lawmaking Snippet
@{ ViewData["Title"] = "Index"; } <h1>Index</h1> <div class="row"> <div grade="col-physician-five"> <grade method="mail service" enctype="multipart/class-data" asp-controller="Demo" asp-action="Index"> <div grade="course-group"> <div course="col-md-10"> <p>Upload file</p> <input class="class-control" proper name="files" type="file" /> </div> </div> <div class="form-group"> <div grade="col-md-10"> <input class="btn btn-success" type="submit" value="Upload" /> </div> </div> </grade> </div> </div> Now Let's Save and Run the application and See How Index View is rendered with Controls.

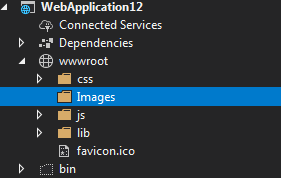
Afterward creating Alphabetize View, we are going to Add Binder with name Images in wwwroot folder to store files in it.
Adding Images Folder to Store Uploaded Images
Adding Index Action Method to Handle Mail Request
Next, we are going to Add Some other Activeness Method with name Index which handle POST request and accept IFormFile every bit an input parameter.
Notation: – IFormFile interface contains all properties of the file which is posted such as Length, ContentType, Filename.
Alphabetize Action Method Which takes IformFile as input in which IformFile interface contains Properties of the Posted file. Next footstep we are going to valid Length of the posted file if it is greater and then zero so we are going generate new file name and too generate a path to shop the file in the folder.
Code Snippet
[HttpPost] public IActionResult Index(IFormFile files) { if (files != goose egg) { if (files.Length > 0) { //Getting FileName var fileName = Path.GetFileName(files.FileName); //Assigning Unique Filename (Guid) var myUniqueFileName = Convert.ToString(Guid.NewGuid()); //Getting file Extension var fileExtension = Path.GetExtension(fileName); // concatenating FileName + FileExtension var newFileName = String.Concat(myUniqueFileName, fileExtension); // Combines 2 strings into a path. var filepath = new PhysicalFileProvider(Path.Combine(Directory.GetCurrentDirectory(), "wwwroot", "Images")).Root + $@"\{newFileName}"; using (FileStream fs = System.IO.File.Create(filepath)) { files.CopyTo(fs); fs.Flush(); } } } render View(); } After completed with calculation Index Action Method next, we are going to Run Application and Test it by uploading an image.
Uploading Image
Output
An epitome which we accept uploaded got uploaded in Images Folder.

hemphilltistonedide73.blogspot.com
Source: https://tutexchange.com/file-upload-in-asp-net-core-mvc-storing-in-folder/
0 Response to "Create a Directory and Save an Uploaded File on It in Asp.net Core"
Post a Comment